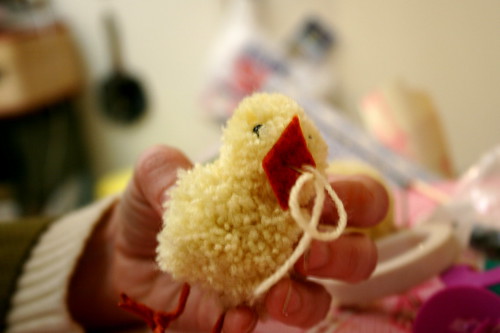
Okay, Well here we go.. My newest creation and I'm going to share this with all you lovely DIY-ers out there.
There are quite a few little steps to make this little goodie..
None are difficult, so don't worry about that. But it makes sense to me to break into a 2 part-er.
We start with the chick.. because a thinkin' person just wouldn't put the cart before the chick!
Now there are other chick tutorials out there, I'm sure,
but this one will guarantee your chick and cart are somewhat "to scale"
Tools you will need:
- Pom pom maker (I use a Clover set)*
- Sharp small scissor
- wire cutters
- a paint brush
- and a darning size sewing needle
- a ruler
Supplies:
- heavy gauge thread wrapped floral wire
- floral tape
- acrylic paint
- baby weight yellow yarn
- Black beads with larger holes
- small diamond shaped piece of orange felt
Step 1: cut floral wire into a 5 1/2 and two 1 1/2 inch lengths
 Step 2: wrap short wires around either end of the long wire so that you have three 'toes'.

Step 3: Wrap floral wire with floral tape. I use white floral tape to make it easier to get the color I want when painting it, but the green will work just fine I'm sure. Floral tape is very moldable, and it takes paint very well. Totally worth the small price tag.
Step 4: Fold your legs so they look like this.
Step 5: Paint and set aside to dry
. ( ack.. that blur. photos on a dark and rainy day!)
Step 5: Wind pompoms. You need two. I use the 1 1/4 inch and 1 3/4 inch wide makers to make the head and body of the chick. And because baby yarn is so fine, I wind it double stranded to save a few seconds.
 (cont.) Wind it until the center of the maker is really full. Your chick will need 'body'. The pieces need to fit back together for the cutting and tying, but they should just barely be able to.
Step 6: Cut and then tie your pom pom. (sorry it's a blurry one!) You fit the tips of your scissors in between the two sides of the pom pom maker and start snipping. Keep a hand on the pieces as you cut so they don't pop apart. Then wind a longer piece of yarn around the center of the maker and tie. Pull the piece of the maker out. ( The maker you use may have more helpful instructions.. and you know what they say "When all else fails: read the instructions!"
step7: Trim the pompoms.
You should end up with a ping pong ball sized pom pom and an oversized egg shaped pom pom.
Step 8: stitch the head to the fat end of the 'egg' using the yarn and darning needle. Cut your yarn pretty long. We dont want to have thread that needle again! make sure you are going through the tied middle if the pompoms or it could break free. Nice and tight. If you cut you yarn long enough have it come out the bottom of the chick body.
Step 9: Sew the legs to the body. a few stitches on either point of the 'M', pulling tightly and fluffing afterward to hide the armature.
have the needle come out of the head where you want you eye.
step 10: Stitch the bead eyes in place. Black headed pins can help you determine where to place the eyes. move them around and find the right spots. This time don't pull too tightly just tight enough to get them set. After they are both set a little back stitch through the back of the head will hold them in place. Then have the needle come back out the front.
Step 11 stitch on felt beak.
One stitch in the center and one on each side, if you need it to get the right expression.
There you have it. Now make two of them!
Tomorrow you will see why two is definitely better than one in this case!
See you tomorrow for part 2... my chickadees!
xxoo,
Betty


 Step 1: Paint your egg with craft acrylic paint. Paint both halves different colors if you like.