Showing posts with label tutorial. Show all posts

Monday, April 18, 2011

Less Than a Bonnet... More than a Bow: A How To for You

Well, I know you are all waiting to see what kind of 
Easter Headgear 
will be the fashion must have of the season.

And it going to be THIS:

for the blog
 
 Yes. 
The Felt Daffodil -Low to No Sew - Spring HeadBand Deluxe

For this tutorial you will need:

Supplies:
Felt in daffodil colors
  fabric glue
cheap plastic headband


Tools:
Scissors and pinking shears
sewing machine (optional.)
 
Start by cutting out the petals and leaf.
Also cut out a stem piece that is not from the pattern 
but rather is long enough and wide enough
to wrap your headband.
 
Now to make the no sew variety... ignore the pattern and cut centers that look like this:
 
Glue the straight edges together  and you get this:


Pinch the petal piece together and put a few dabs of the fabric glue
in the center at the folds. My pinched petals look like this:

Add center to the front with another dab of glue:


Now glue and wrap the headband:


Seam up the center of the leaf if you are so inclined:


Glue the leaf across top of the head band:


Glue the two blossoms slightly off on one side of the headband:


Now Go On... Get Your Spring On..
96/365 Wilde Headdress


And speaking of getting one's Spring On:
Two Great A-Longs That would be great together:
Made By Rae's Spring Top Sew Along
 
And Miss P.'s Top Draft A Long:
 
 
Put those Spring Sewing Super Powers to Good Use
and learn something new doing it!!

Monday, April 11, 2011

Felt Daffodil: Free Pattern and Tutorial... Because I love You Guys.

for the blog
 For this tutorial you will need:

Supplies:
Felt in daffodil colors
thread to match
or fabric glue
optional bamboo skewer for stalk


Tools:
Scissors and pinking shears
Needle
sewing machine (also optional.)


Cut out all the pattern pieces with regular scissors, except for the top of the center piece. Cut that with pinking shears.


Roll the center into a tube and glue or stitch the sides together. I used a contrasting thread to show you how.

Sew a running stitch along the bottom of the center piece.
Be sure and leave long tails on the thread. 
Use the tails like draw strings
to close up the bottom of the center, 
and tie with a hard knot. Trim.
Scrunch up the petal piece a little and stitch to the center piece around the bottom.
There is your finished blossom.


 Just stitch the felt leaf and stem for a soft embellishment  like on the easter basket above or...
for the blog

Glue or stitch the felt around the bamboo skewer and seam the leaf up the center for a flower that stands up.

Viola!

Friday, April 01, 2011

Shir- Fire Success: The Shirred Top Tutorial (No Fooling!)


I made myself  a super comfy fairly easy new blouse using elastic thread shirring!
A few of my Me Made March buddies said they'd like a tutorial so...
Here We Go!! 
( A little late. My PDF creating skillz are lacking!!!)

 
For this project you'll need:

Supplies:
  • Prewashed and ironed fabric. 1.5-2 yards
  • Matching and contrasting thread
  • Elastic thread

Tools :
  • measuring tape
  • scissors
  • marking method (tracing wheel and paper or dressmaker's pencil or pen is best)
  • straight edge
  • sewing machine 
  • downloaded PDF

1: 
Use the PDF to measure and cut the pieces for your shirt.
It's a few steps to get the measurements done.
The Math is easy!


2:
Mark your cut pieces on the 'right side' of the fabric.
use a straight edge and a more precise marking tool.
Straight lines to follow make all the difference!
More info on this step is in the PDF.

3: 
Hand wind your bobbin with the elastic thread.
Don't Pull It Tight.

4:
Join and hem pieces according to PDF instructions.
Use  matching thread to make these stitch lines less obvious.
( No pic, sorry, I just forgot to take one!!)

5:
Load elastic bobbin, thread machine with
contrasting thread for a more Faux smocked look
and set stitch length to the longest possible.
Start shirring.
Right side up, stitching carefully on the lines you marked.
Pull the fabric gently as you go, to make the few inches 
in front of the presser foot flat.

6:
Pull the cotton thread through to the back
and knot it to the elastic thread as you go. 
The stretchy nature of the elastic thread
will pull itself loose very quickly

7: 
When you are done your shirring should look like this!~
If it's looser, a little blast of steam from your iron will help it gather.

8:
Join final sleeve to back panel.
(Again no pic. I got too excited!)
(you could try and do this before you shir, 
but I like having the flatter garment to work on
what with all the bunching that is already involved!)
And then sew down the sides.

9:
Hem and Wear it!


I love these silly little blouses because they are perfect for warm weather. 
Comfy and breezy.
All the tiny knots take a little time, 
But I will probably wear this once a week all summer! 
And if you get the shirring principle down?
You can add shirred wasitbands,  or smaller rectangular panels, little plackets...
The imagination reels!

Sew On, My dearies!
Betty
Wednesday, March 16, 2011

The Chick 'N Cart Tutorial: Part 1- The Chicks!


Final Photo for the Chick N' Cart

Okay, Well here we go.. My newest creation and I'm going to share this with all you lovely DIY-ers out there.
There are quite a few little steps to make this little goodie.. 
None are difficult, so don't worry about that. But it makes sense to me to break into a 2 part-er.

We start with the chick.. because a thinkin' person just wouldn't put the cart before the chick!
Now there are other chick tutorials out there, I'm sure,
but this one will guarantee your chick and cart are somewhat "to scale"

 
Tools you will need:
  • Pom pom maker (I use a Clover set)*
  • Sharp small scissor
  • wire cutters
  • a paint brush 
  • and a darning size sewing needle
  • a ruler


Supplies:
  • heavy gauge thread wrapped floral wire
  • floral tape
  • acrylic paint
  • baby weight yellow yarn 
  • Black beads with larger holes
  • small diamond shaped piece of orange felt
 Step 1: cut floral wire into a 5 1/2  and two 1 1/2 inch lengths
IMG_5889_2
  
Step 2: wrap short wires around either end of the long wire so that you have  three 'toes'.
IMG_5901 


Step 3: Wrap floral wire with floral tape. I use white floral tape to  make it easier to get the color I want when painting it, but the green will work just fine I'm sure. Floral tape is very moldable, and it takes paint very well. Totally worth the small price tag.
Step 4:  Fold your legs so they look like this.


Step 5: Paint and set aside to dry. ( ack.. that blur.  photos on a dark and rainy day!)
Step 5: Wind pompoms. You need two. I use the 1 1/4 inch and 1 3/4 inch wide makers to make the head and body of the chick. And because baby yarn is so fine, I wind it double stranded to save a few seconds.
(cont.) Wind it until the center of the maker is really full. Your chick will need 'body'. The pieces need to fit back together for the cutting and tying, but they should just barely be able to.
Step 6: Cut and then tie your pom pom. (sorry it's a blurry one!) You fit the tips of your scissors in between the two sides of the pom pom maker and start snipping. Keep  a hand on the pieces as you cut so they don't pop apart. Then wind a longer piece of yarn around the center of the maker  and tie. Pull the piece of the maker out. ( The maker you use may have more helpful instructions.. and you know what they say "When all else fails: read the instructions!"


step7: Trim the pompoms.


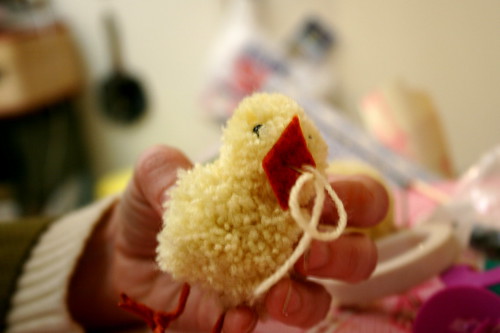
You should end up with a ping pong ball sized pom pom and an oversized egg shaped pom pom.


Step 8: stitch the head to the fat end of the 'egg' using the yarn and darning needle. Cut your yarn pretty long. We dont want to have thread that needle again!  make sure you are going through the tied middle if the pompoms or it could break free. Nice and tight. If you cut you yarn long enough have it come out the bottom of the chick body.


Step 9: Sew the legs to the body. a few stitches on either point of the 'M', pulling tightly and fluffing afterward to hide the armature.
have the needle come out of the head where you want you eye.


step 10: Stitch the bead eyes in place. Black headed pins can help you determine where to place the eyes. move them around and find the right spots. This time don't pull too tightly just tight enough to get them set. After they are both set a little back stitch through the back of the head will hold them in place. Then have the needle come back out the front.


IMG_5917_2

Step 11 stitch on felt beak.
 One stitch in the center and one on each side, if you need it to get the right expression.


There you have it. Now make two of them!
Tomorrow you will see why two is definitely better than one in this case!


See you tomorrow for part 2... my chickadees!
xxoo,
Betty

Friday, March 11, 2011

Make Yourself A Box Pleat Skirt!

Well, I was just about beside myself with wanting 
a cute preppy big box pleat skirt...
so I made one.
 I just drafted the pattern myself.


This was not hard to do at all!
I already had a basic pattern for an A line skirt already drafted.
(If you want to see how to do that you can check out
Don't add in the 6 inches for overlap and boom.. basic A line pattern. )

Then I put in two inverted box pleats (Let Sally Stitch show you how!) 
about 8 inches apart and 2.5 inches deep.
Iron, pin the pleats closed at the bottom. 

Fold the rectangle in half and cut out the A line skirt front.
Trace a little facing and cut 2.
That is like the top  4 inches or so, of the skirt pattern.
An inner waistband for your skirt.


Then use the pattern to  cut out the back of the skirt.
Just a nice plain A line. 

No Pleats.

Add darts to make the back curve with you and the waist fit perfectly.
Then stitch the facing to the skirt (right sides facing, flip to the inside and press)
and hand stitch it to the inside at the zipper.


Wasn't That Easy?
Related Posts Plugin for WordPress, Blogger...