 Once only a lonely lost piece of luggage Now this cutie is full of gift tag and correspondence goodies...
I like a good vintage suitcase, but after you aquire 40 or 50 of these little darlings it might begin to occur to you that you can and quite frankly MUST give them a second incarnation of true utility, or buy them their own house or something.
While thrifting in my old hometown got a sweet little green case and
I was reminded of of something I saw on Koreana's Flickr that she had scanned from a Cottage Living (I think) article.
So I gutted the little darling.
It was yucky, wear gloves.
 cute on the outside...groddy on the inside. But for 2.00, who cares?
And now my step by step Tutorial on the vintage case upgrade.
You will need
a stripped out vintage suitcase
paper bag or large paper to trace a pattern. sturdy is better
fancy paper or fabric- amount varies by case size I used 2 large sheets of paper
foam core enough to make an insert for case lid and bottom
a large piece of poster board- enought to wrap around the sides of the case top and bottom
I used bias tape for an accent trim
flat elastic for tool loops
glues:
spray adhesive
hot glue
craft knife and scissors
1)Use a paper bag to make a template of the lid and bottom of the suitcase.
2) Use the template to cut the shape from foam core board or corrugated cardboard.

3) Lay out the tools the way you'd like them to hang in the case. Mark the back of the board where you will add elastic loops. (In the final design, the large pinking shears were too heavy for this lid insert.)

4) Cut the paper extra large round the board

and clip notches in the overhang, so it will lay properly as it's folded over.

5) Mount with spray adhesive. Fold over edges and let dry
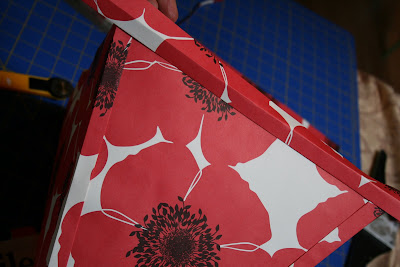
6) Cut strips of the poster board to fit into the edges of the bottom and the edges the lid of the case. Cut paper to cover; enought to fold over the top and have 2-3 inched of notching clips on the bottom. ( Similar to lid insert.) Glue to cardboard, I used the spray adhesive.
7) Fit sides to inside of case.

You might need to slice 3 or 4 really deep notches to go around rounded corners.

Hot glue into place. Notched ends can be secured with white glue or more hot glue,
8) Apply bias tape as an accent and to hide little goofs.

9)Now lay out the tools and add the elastic loops to hold them in place. I pierced the paper and board witha sharp clean standard screw driver, and fed the elastic through from the front to prevent paper fraying. Mine are secured with knots and hot glue on the back side.

10)Hot glue in lid and bottom panels
11)Fill and thrill to the joy of your super custom stylish craft case.

12) Decorate the outside of the case as you see fit. Mine got a floral racing stripe decoupaged to it. But a stencil could have been really cool too...

Wanna be penpals? I got the paper.
Smooches dolls,
Betty


